创建Maven工程
在idea中新建项目,选择Maven工程
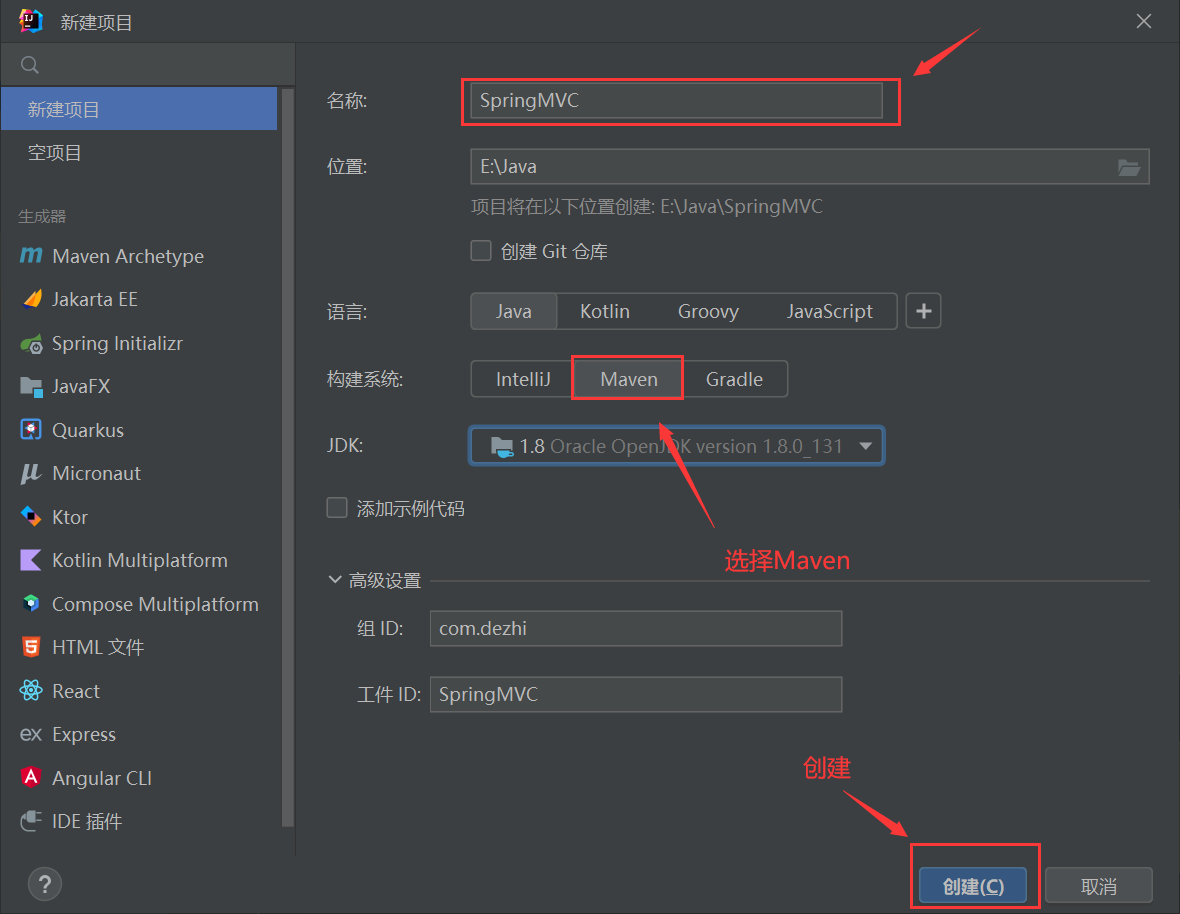
设置打包方式为war包
在pom.xml中添加以下标签
1
| <packaging>war</packaging>
|
引入相关依赖
在pom.xml中添加以下标签
1
2
3
4
5
6
7
8
9
10
11
12
13
14
15
16
17
18
19
20
21
22
23
24
25
26
27
28
29
30
| <dependencies>
<dependency>
<groupId>org.springframework</groupId>
<artifactId>spring-webmvc</artifactId>
<version>5.3.1</version>
</dependency>
<dependency>
<groupId>ch.qos.logback</groupId>
<artifactId>logback-classic</artifactId>
<version>1.2.3</version>
</dependency>
<dependency>
<groupId>javax.servlet</groupId>
<artifactId>javax.servlet-api</artifactId>
<version>3.1.0</version>
<scope>provided</scope>
</dependency>
<dependency>
<groupId>org.thymeleaf</groupId>
<artifactId>thymeleaf-spring5</artifactId>
<version>3.0.12.RELEASE</version>
</dependency>
</dependencies>
|
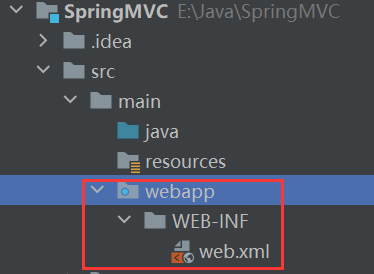
添加webapp及其子文件
位置如下
添加webapp目录,在其下面添加WEB-INF目录,在WEB-INF下面添加web.xml文件
web.xml文件内容如下,配置DispatcherServlet前端控制器
1
2
3
4
5
6
7
8
9
10
11
12
13
14
15
16
17
18
19
20
21
22
23
24
25
26
27
28
29
30
31
32
33
| <?xml version="1.0" encoding="UTF-8"?>
<web-app xmlns="http://xmlns.jcp.org/xml/ns/javaee"
xmlns:xsi="http://www.w3.org/2001/XMLSchema-instance"
xsi:schemaLocation="http://xmlns.jcp.org/xml/ns/javaee http://xmlns.jcp.org/xml/ns/javaee/web-app_4_0.xsd"
version="4.0">
<servlet>
<servlet-name>springMVC</servlet-name>
<servlet-class>org.springframework.web.servlet.DispatcherServlet</servlet-class>
<init-param>
<param-name>contextConfigLocation</param-name>
<param-value>classpath:springMVC.xml</param-value>
</init-param>
<load-on-startup>1</load-on-startup>
</servlet>
<servlet-mapping>
<servlet-name>springMVC</servlet-name>
<url-pattern>/</url-pattern>
</servlet-mapping>
</web-app>
|
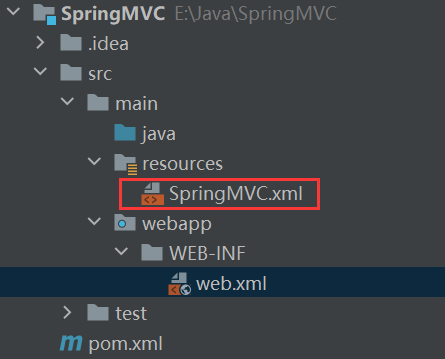
添加SpringMVC.xml配置文件
文件位置如下
文件内容如下,配置自动扫描包和Thymeleaf视图解析器
1
2
3
4
5
6
7
8
9
10
11
12
13
14
15
16
17
18
19
20
21
22
23
24
25
26
27
28
29
30
| <?xml version="1.0" encoding="UTF-8"?>
<beans xmlns="http://www.springframework.org/schema/beans"
xmlns:xsi="http://www.w3.org/2001/XMLSchema-instance"
xmlns:context="http://www.springframework.org/schema/context"
xsi:schemaLocation="http://www.springframework.org/schema/beans
http://www.springframework.org/schema/beans/spring-beans-4.3.xsd http://www.springframework.org/schema/context https://www.springframework.org/schema/context/spring-context.xsd">
<context:component-scan base-package="controller"/>
<bean id="viewResolver" class="org.thymeleaf.spring5.view.ThymeleafViewResolver">
<property name="order" value="1"/>
<property name="characterEncoding" value="UTF-8"/>
<property name="templateEngine">
<bean class="org.thymeleaf.spring5.SpringTemplateEngine">
<property name="templateResolver">
<bean class="org.thymeleaf.spring5.templateresolver.SpringResourceTemplateResolver">
<property name="prefix" value="/WEB-INF/templates/"/>
<property name="suffix" value=".html"/>
<property name="templateMode" value="HTML5"/>
<property name="characterEncoding" value="UTF-8" />
</bean>
</property>
</bean>
</property>
</bean>
</beans>
|
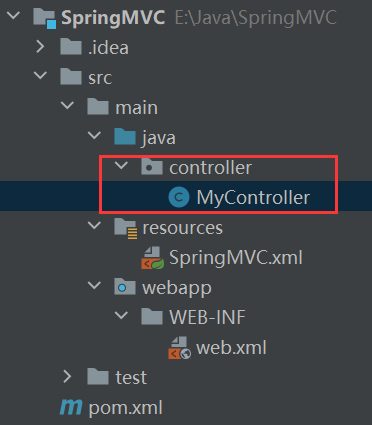
添加controller层和MyController类
MyController内容如下
1
2
3
4
5
6
| @Controller
public class MyController {
@RequestMapping("/")
public String index() {
return "index";
}
|
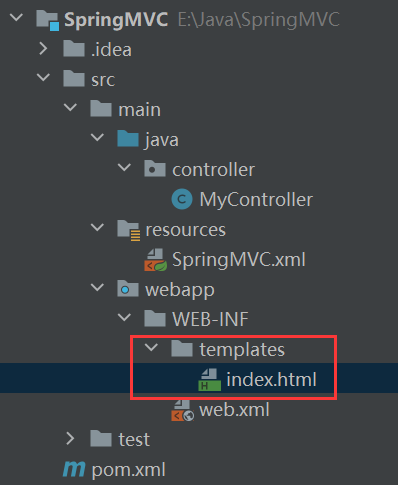
创建templates文件夹和index.html
创建位置如下
index.html内容如下
1
2
3
4
5
6
7
8
9
10
| <!DOCTYPE html>
<html lang="en" xmlns:th="http://www.thymeleaf.org">
<head>
<meta charset="UTF-8">
<title>Title</title>
</head>
<body>
<h1>Hello,world!</h1>
</body>
</html>
|
配置Tomcat服务器
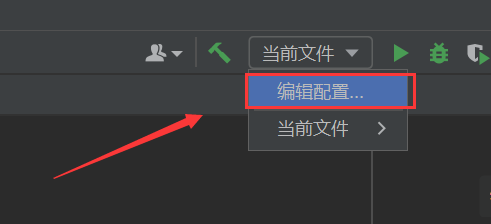
点击编辑配置
选择Tomcat本地

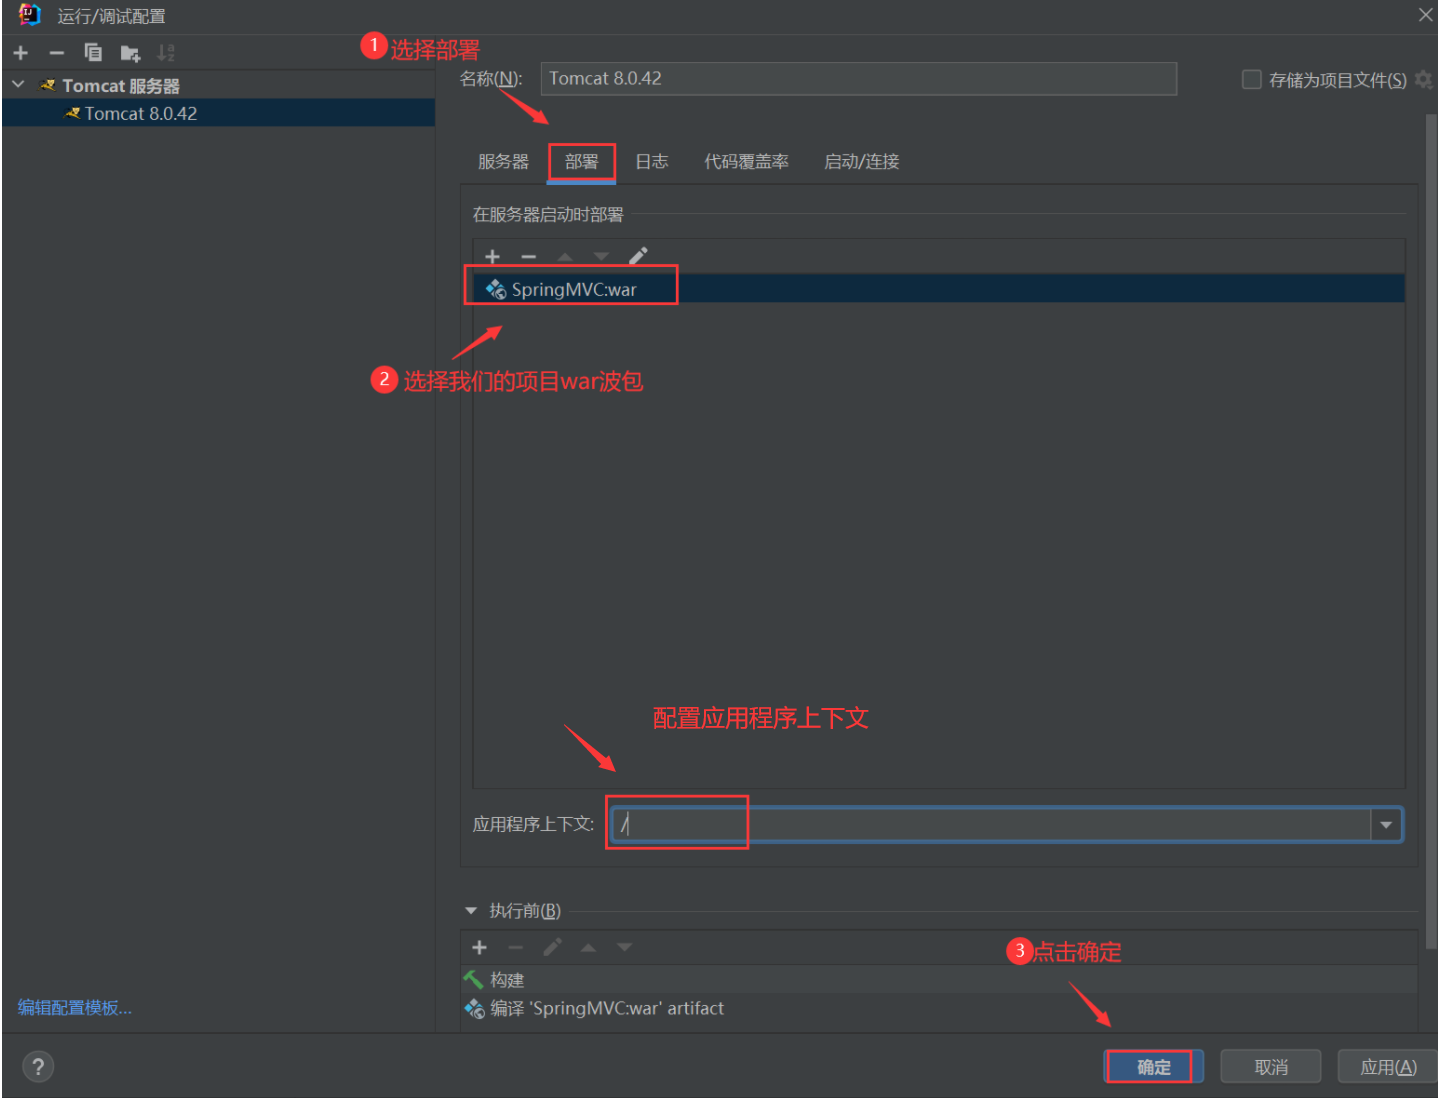
在部署的部分选择我们的项目war包,点击应用和确定,Tomcat就配置完成
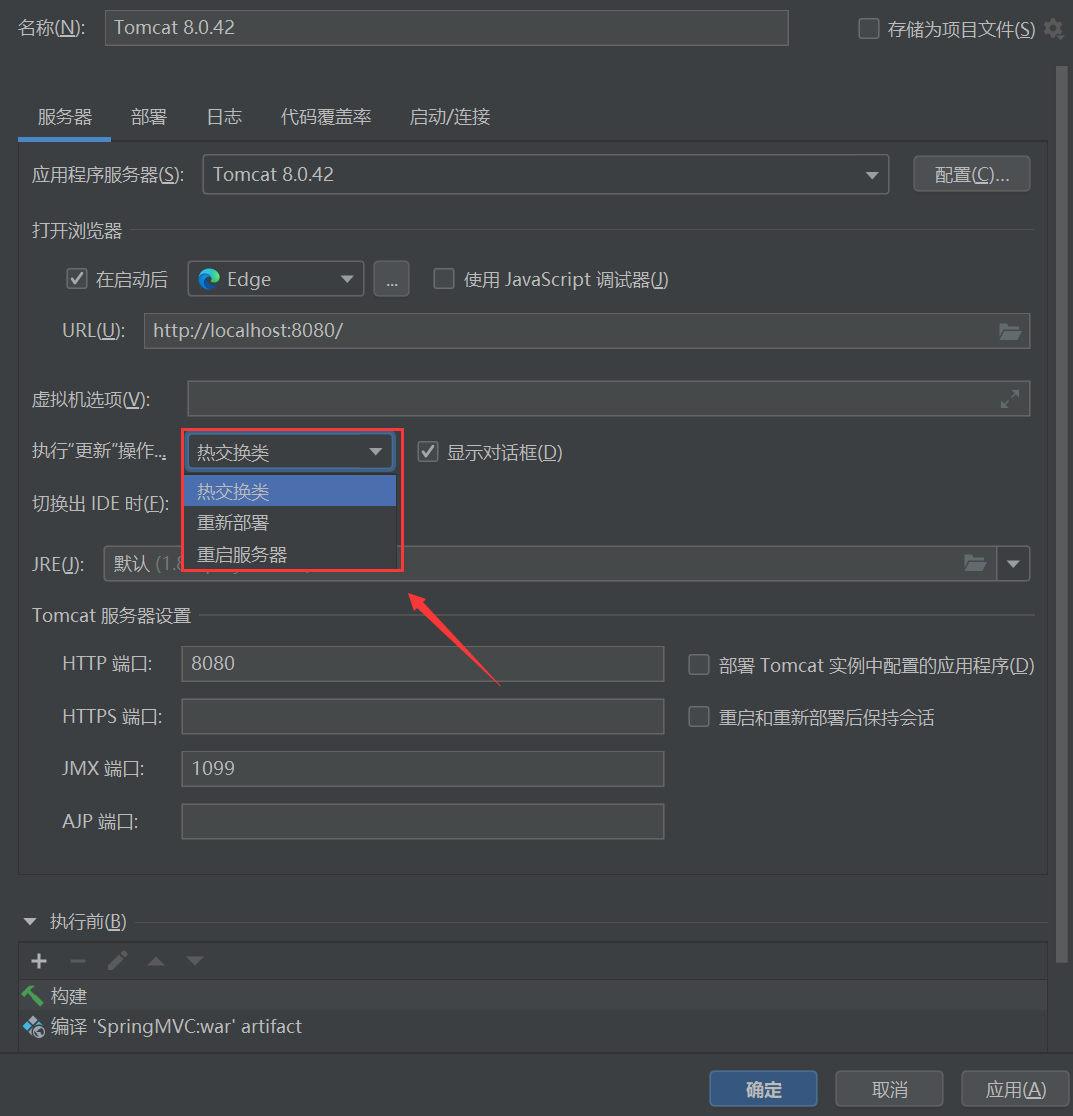
为了能够在我们修改源代码时,服务器内容能够快速更新,我们选择热交换类
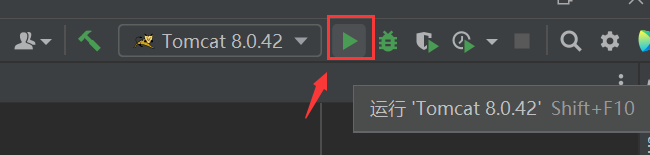
启动Tomcat服务器,访问目标页面
启动Tomcat服务器
访问目标页面:http://localhost:8080
可以看到以下界面,就说明SpringMVC环境已经搭建好了